Your water system can be as complex as you can imagine, with a rainwater
catching system with carbon filters and UV light filtration or reverse osmosis filtering (saw it on a bus
conversion - no kidding) to carrying water in your cabinets in Jerry
cans that you fill up at gas stations. Your main considerations are how
much water do you think you'll use? A full bathtub is an average of 110
gallons of water, and one gallon of water weighs approximately 8.6lbs.
Weight is the second most important factor; Where and how can I support
the weight of carrying water? After I wash my dishes or take a shower, where can I store that used water? (referred to as Grey/Gray water). Most
RVs have a solid plastic water container that stores around 40 to 80
gallons of fresh water, and have a direct hookup for water when they
park at campsites. A lot, or even most, RVs here in the USA are designed to go from campground to campground and hook up directly to the water supply at that campsite. They use a simple water regulator that screws unto their water hose (like a garden hose) and that lowers the pressure at the site to a faucet-like 45psi - 65psi, runs through their indoor system, and they keep a minimal amount of fresh water between campsites.
I've designed my build to be completely off-grid, no campsites, no hookups, pack in and pack out. This is called boondocking, and you'll hear that term a lot. I wanted to be able to go out into the desert somewhere for a couple weeks and not have to worry about spending $25 a night to stay in some campground. So how do you do that?
Usually water tanks are solid plastic containers that are mounted somewhere on the vehicle, perhaps underneath, and you fill this with a normal water hose (a hose rated for potable water - otherwise your water will taste like plastic) and the outlet of the tank is attached to a self-priming water pump, or a water pump with an accumulator tank. The water pump will pull the water out of the tank and send it through all the pipes in your RV, pressurizing it to 45psi (normal faucet psi). A lot of pumps are "self-priming", meaning they can pull the water out of the tank by itself, without the need of an accumulator tank. My water pump for example primes "up to 6 feet", meaning my pump can be mounted up to 6 feet above the water tank and it can still pull the water no problem. If your tank is farther away from the pump than the self-priming limit of a pump, then you need an accumulator tank attached to the pump that helps to pressurize this water line before it reaches the pump. Personally, I bought a $60 water pump at home depot that self-primes, and I can't imagine most people needing to go through the trouble of an accumulator tank install as well when this pump was so simple.
 |
| 12V SEAFLO pump hooked up to my PVC lines |
 |
| The inlet and outlet lines from the pump are 1/2" reinforced vinyl tubing, so they can withstand the pump vibration. Make sure to read your pump manual |
Usually people buy a large rigid container to store their water, but the downside to these tanks is that when you're driving and the tank isn't completely full, the water will slosh around and it's very heavy. It's difficult to support and contain the weight of hundreds of pounds when it's sloshing around, so most people drive around with an empty tank and fill up when they get to their destination. To bypass this, I bought a water bladder instead, which expands based on how much water I add and the weight of the water should always displace itself somewhat evenly, in a downward direction, even when driving.
So I bought a food safe water bladder instead to use as a water tank, and built a storage compartment with the bladder inside so the bladder can only expand to the container's dimensions, and the weight of the water will always be distributed as low and as flat as possible. If I had the ability to weld a storage cage underneath the truck for the water, that would have been ideal. I think in the future I'll actually carry more water in a trailer, but that's for another time.
 |
| BayTec Container's Aquatank Water Bladder. |
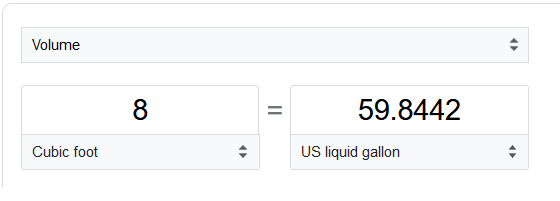
I originally wanted 80 gallons of water storage, but decided later on to move the tank to the rear of the truck and cut the size down to 60 gallons. Since my bladder was a 150gallon capacity, I had to find out how big the inside of the container should be so that it only can store 60 gallons. You can convert the volume of liquid to cubic feet to better understand how much 3D space a gallon would take up.
 |
| https://www.ginifab.com/feeds/cbm/cubic_feet_calculator.html |
I played around on this site for a while until my dimensions matched the cubic ft requirement I needed for 60 gallons.
Now I knew the size, so I started to build the storage container for it. Your water tank needs the inlet to be higher than the rest of the tank, and your outlet to be at the lowest point.
Building The Tank:
 |
| Base plate with corner support brackets |
I wanted the tank to have a larger base on the bottom than the actual storage box so that it could more evenly disperse the weight and be able to bolt it down. I used 3/8 OSB and marked the dimensions of the box itself on the base. (Plywood would probably work better, but it's been almost 6 years now with my sealed OSB and it's still working great)
 |
| You'll need a circular saw to cut these panels - adjusted to 1/4 inch thicker than the material |
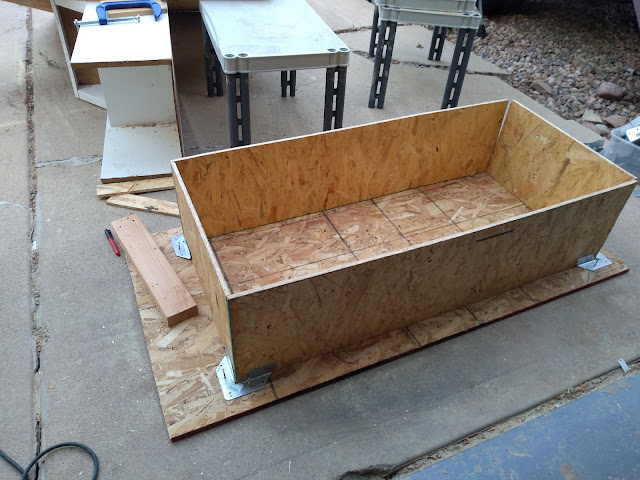 |
| I left two inches around the tank to be able to bolt it down later, with a larger space on the outlet side |
The reason I left a larger space on the outlet side is so I can add a pipe that the outlet tube will rest in. The idea is to stop the outlet tube from getting pinched when the tank is full and it will hold it in place. This is really critical - if your outlet tube gets pinched later on, you'll have to take this whole thing apart.
 |
| Outlet tube - 1.5inch diameter PVC with waterproof flashing tape on the edges |
 |
| Internal framing for stronger corner support while driving |
 |
| Adjusting the bladder and adding insulation |
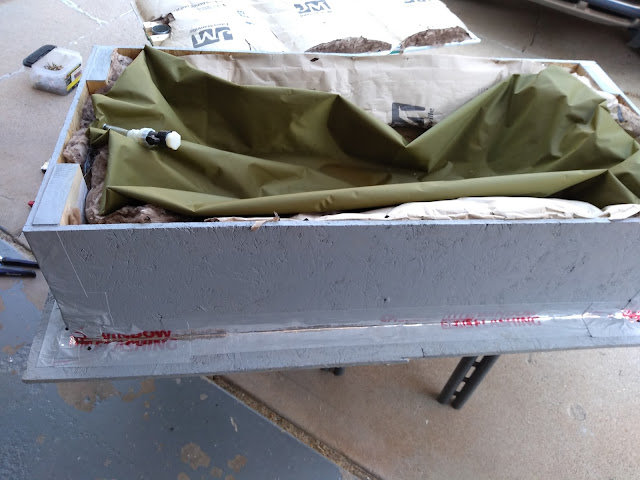 |
| Here you can see the inlet. I'm going to add a 2 inch diameter pipe with a cap on the lid that the inlet will rest inside off |
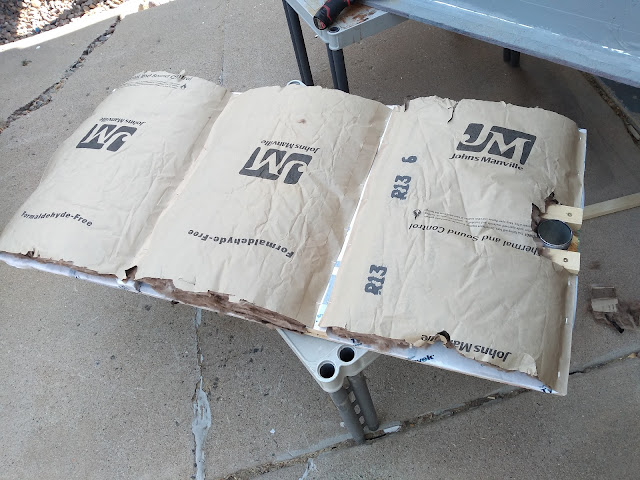 |
| Here is the lid before it's screwed down. I used 2 inch pipe as the entrance for the inlet, but I would recommend only using PVC because it rusted on part of the threads within six months |
 |
| I added an extra drain plug on the bottom in case the bladder ever broke for some reason to drain excess water |
 |
| The wood on top is to create a slant for the roof of the tank so water doesn't pool on the top. The inlet is capped off with a 2inch female threaded cap |
 |
| Galvanized sheeting used as the roof of the tank with silicone on the edges |
 |
| The bolts go through the metal bracket, through the base, to mount the tank. Two for each corner |
I painted all of the OSB with a rubberized roofing sealant (paintable), and eventually painted with normal external paint. This has held up for almost 6 years now, so going good!
An oversight of mine, after the tank was made, was how much space the framing took on the inside. This brought the internal dimensions down to about 6 Cubic ft - making the water tank a 45 gallon capacity instead of 60 gallons. It's still an acceptable size, and brings down the weight, but remember to include the framing in your dimensions!
Mounting the Tank:
The entire carrier is built on top of 4 x 4s that I bolted through the rear step with grade 8 bolts. On top off the 4x4s I screwed down pressure treated 2 x 12s, cut to the full width of the carrier. (which is slightly less width than the truck so it's not damaged while turning).
I used three 2 x 12s with about 1/4inch between them for water drainage. All 4 x 4s are cut to the same length and the base plate for the water tank is bolted through the 2 x 12 planks with grade 8 bolts and flanged locking nuts, as well.
 |
| Here is the water tank screwed down onto those 2 x 12s |
Here is how it looks now:
 |
| The far left is propane storage, middle is the water tank, and generator storage on the right |
The last drive I had was a 5 hour drive, and extremely bumpy, and all of the wood held on great. I had moved my watertank right before the drive (like 2 days) so it didn't cover my taillights at the time, but I forgot to really tighten the locknuts on the bottom of the carrier before I left, and by the time I drove all the way here some of them had came loose; Surprisingly the wood didn't sag or anything- I have since re-tightened them and added lock-tite to make sure they do not come loose again, and I'm confident it's going to hold the weight. If it does end up being an issue, I think I'll have a welder come in and re-enforce the whole platform with steel, but so far it doesn't seem to be an issue.
Water tank plumbing: Outlet pipes
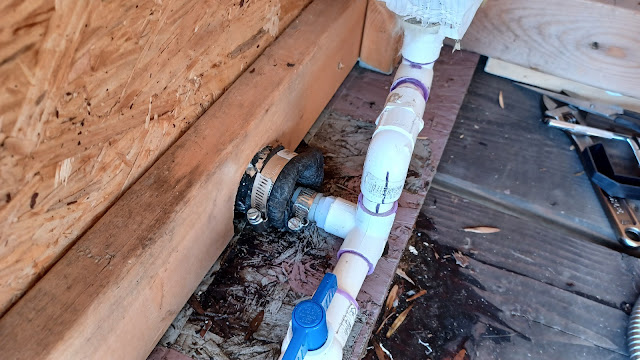
So my water tank rests on a rear carrier, it's filled up with a normal water hose, and the outlet pipe on the tank is direct connected to PVC pipe that goes to my water pump and indoor lines. Here below is the vinyl outlet line from the tank that I connected to PVC lines.
Originally the outlet for the water tank was a 5/8th barb fitting with a 3/4 male Garden hose thread on the other side. I originally had a swivel garden hose fitting on this end, but it never tightened enough so I replaced the barb fitting with a 5/8th barb x 1/2" male NPT fitting to attach it straight to the pipe.
 |
| That giant white fitting on the left was the original fitting with the tank. That brass fitting in the middle never screwed on well enough, and it wasn't fit for potable water anyway |
 | |
| Here it is connected correctly. I bought a hose clamp to secure the vinyl pipe to the fitting |
The PVC pipe runs across the carrier, up the wall, through the wall, to a shutoff valve, and then to the pump. (Actually, I have a copper water heater line connected to this and then to the wall to use a pipe-warming system to stop it from freezing but I haven't tested that yet so it might go.)
In the last picture on the bottom, there is a valve on the bottom - that's the drain valve for the tank. Especially helpful when you want to winterize or clean out the tank.
Overall this design has worked really well. The only thing I have as an extra to this design is a flow counter attached to my water hose to show how many gallons of water I've added - since I can't know when it's full or not. That's a downside for sure. In the future I'm planning to add a flow-counter into the system past the pump to measure how many gallons I've used, and create a little water alert system with an Arduino - but that's for later.
Otherwise I hope this helped you with your tank or gave you an idea for rear storage on your vehicle! If you have any questions, feel free to ask.
Sincerely,
Kelli


No comments:
Post a Comment